
Caramelised Insect Ice Cream - Recipe

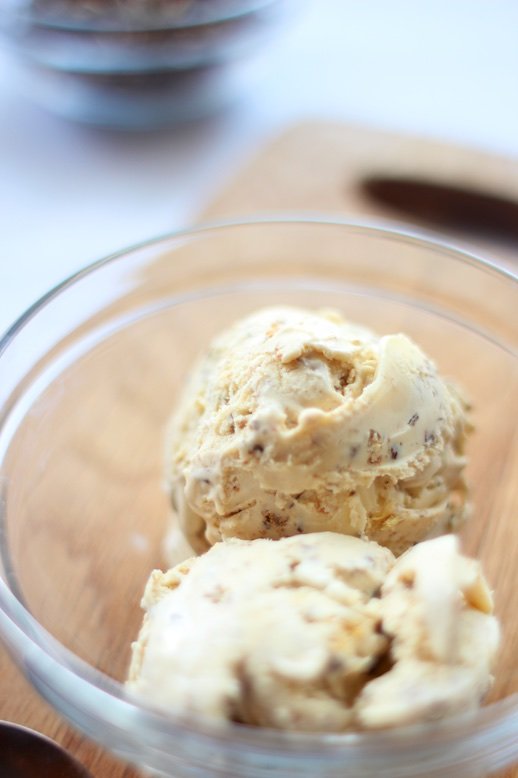
 Crickets are often touted as a sustainable and protein-packed alternative to livestock. In their report titled Edible Insects: Future prospects for food and feed security, the United Nations promotes eating insects as a viable way of feeding an ever growing global population. The report estimates that ‘insects form part of the traditional diets of at least 2 billion people’ with locusts and crickets, at 13%, being some of the most commonly consumed insects.This caramelised insect ice cream produces extremely smooth and creamy ice cream with a nice smoky cricket flavour slightly reminiscent of grilled shrimp. Trust me, it does work. The recipe will be split into three sections: SECTION 1: The Science of Ice Cream Making and Preparation Tips; SECTION 2: Full Recipe; and SECTION 3: Quick-Read Recipe.Please click here to read SECTION 1: The Science of Ice Cream Making and Preparation Tips. I strongly recommend starting with this section.YOU MIGHT ALSO FIND THE FOLLOWING POSTS HELPFUL:
- Whynter ICM-200LS Ice Cream Maker - Review
- Pistachio Ice Cream - Recipe
- Vanilla ice cream - Recipe
- Coffee Ice Cream Recipe
- Sugar in ice cream
- How long does homemade ice cream last in the freezer?
- The role of protein in ice cream
- Why does ice cream melt?
- Ice crystals in ice cream
SECTION 2: FULL RECIPE
PREP TIME:About 10 minutes
HEATING TIME:About 35 minutes
INGREDIENTS:CreamFull-fat, semi-skimmed, or skimmed milkUnrefined sugarSkimmed milk powderEgg yolks30g dehydrated crickets1 teaspoon vanilla extract15g brown sugarProduces about 800 ml (0.85 quarts) of ice cream mix and caramelised crickets
1. THE IMPORTANCE OF MILK FAT
Milk fat contributes significantly to the rich, full, and creamy flavour and to the smooth texture of ice cream (Goff & Hartel, 2013). Not enough milk fat is likely to produce ice cream that is coarse or sandy, whereas too much will likely result in a heavy buttery texture. Above is the spreadsheet I use to calculate my mixes and I've included it for you guys to accurately calculate the quantities of milk and cream that you'll need. It's based on the mix formulation calculations in [amazon text=Ice Cream (7th ed) (2013)&asin=1461460956] by Goff & Hartel, which I highly recommend reading.
It's important that you check the fat content percentage of the milk and cream that you'll be using. Here in the U.K, our double cream and skimmed milk contain between 47.5% and 50.5% and less than 0.5% of milk fat respectively. You can use full-fat, semi-skimmed, or skimmed milk.
To start, enter the fat percentage of your cream in the yellow Cream Fat % cell located on the top left of the spreadsheet. Do the same for the milk fat percentage in the yellow Milk Fat (%) cell. PRESS ENTER, OR CLICK ON A DIFFERENT CELL, FOR THE SPREADSHEET TO UPDATE. The spreadsheet will then display the quantities of milk, cream, sugar, egg yolks, and skimmed milk powder needed (in grams) in the cells in blue.
2. PREPARING AN ICE BATH
Before you start preparing your mix, take a large bowl and fill it with enough ice to make an ice bath. Have a large zip-lock freezer bag ready next to the bowl, along with some table salt. We'll be using the zip lock bag and ice bath to ensure that the mix is cooled as quickly as possible after heating. This minimises the time the mix spends in the ‘danger zone’, between 5°C (41°F) and 65°C (149°F), where bacteria likes to multiply. The longer your mix spends in this temperature range, the more bacteria is likely to multiply and impart an undesirable taste and smell.
3. HEATING THE MIX
Weigh your pan and record its weight. We'll use this weight to check whether we've achieved the desired 15% reduction after 25 minutes of heating.
Once you've prepared the ice bath and weighed your pan, add the sugar and skimmed milk powder followed by the egg yolks. Mix the yolks, sugar and skimmed milk powder to help prevent the yolks from curdling during heating.
Add the cream and milk and spend a good minute or so mixing all the ingredients before you switch on the heat.
Over a medium heat, heat the mixture until the temperature reaches 71°C (160°F), making sure that you're constantly stirring. You'll risk burning the milk proteins and curdling the egg yolks if you don't constantly stir the mix. It takes me 10 minutes to get my mix up to 71°C (160°F).
Once the temperature reaches 71°C (160°F), turn the heat down to low, move your pan slightly off the heat, and continue heating and stirring until the temperature reaches 72°C (162°F). Use a food thermometer to keep your mix at 72°C (162°F) for 25 minutes, adjusting the position of your pan to help regulate the temperature. Don't worry if you go slightly over 72°C (162°F); just try and keep the temperature as close to 72°C (162°F) as you can.
4. COOLING THE MIX
After 25 minutes of heating at 72°C (162°F), take the pan off the heat and weigh it. If the weight is greater than 850g plus the weight of the pan, place it back on the heat and continue heating for another 2-3 minutes or until you get the weight down to 850g.
Carefully pour the mix into the zip-lock bag and seal. Place the sealed bag in the ice bath and pour about a tablespoon of salt onto the ice to lower the temperature and cool the mix faster.
Once the mix has cooled to below 5°C (41°F), place the zip-lock bag in the fridge and leave overnight to age.
5. PREPARING THE CARAMELISED CRICKETS
Once you’ve aged your mix overnight, place the crickets and brown sugar on a baking sheet and mix well. Set your grill to medium heat and, with the baking sheet fairly close to the grill, grill the crickets and sugar until the crickets start to darken and crisp and some of the sugar has melted. This takes me about 10 minutes. Make sure that you constantly turn the crickets and sugar to prevent them from burning.Once you've achieved a dark, crispy colour, and some of the sugar has melted, transfer the crickets and brown sugar mix to a pan and heat over a medium heat whilst constantly stirring. This is to melt more of the sugar into the crickets to give them a nice crispy texture, and also to caramelise the sugar and impart a slightly dark bitter note.When you see the sugar start to smoke, quickly take the pan off the heat and continue stirring for another minute or so. Transfer the caramelised crickets to a bowl and allow to cool to room temperature. Once the caramelised crickets have cooled to room temperature, place the bowl in the freezer for 10 minutes to bring the temperature down to about 4°C (39°F).
 6. CHURNING THE MIX
Once the caramelised crickets have cooled to about 4°C (39°F), carefully pour your ice cream mix into your machine followed by the crickets and vanilla extract.
TIP#1 - FREEZER BOWL WALL TEMPERATUREIf you're using an ice cream machine with an in-built compressor, with the bowl in the machine, switch on the compressor and leave it running for 15 minutes before adding the mix. This will ensure that the freezer bowl is as cold as possible when the mix is added, which increases the rate of nucleation and reduces residence time.
TIP#2 - EFFICIENT HEAT TRANSFERIf you’re using the Cuisinart ICE 30BC, use your thumb to push the dasher against the side of the bowl as soon as you pour in the mix. This will ensure that the dasher scrapes off the layer of ice that freezes to the side of the bowl. Any ice that is frozen to the side of the bowl will act as an insulator, slowing the release of heat from the ice cream to the bowl and increasing the residence time. Goff & Hartel (2013) note that even a very thin layer of ice remaining on the bowl wall can cause a dramatic reduction in heat transfer.
Use a spoon to push along any static lumps of ice cream and ensure that the mix is constantly moving whilst in the machine. Static lumps will likely take longer to freeze, resulting in greater ice crystal growth.
7. DRAW TEMPERATURE
Your ice cream will be ready when it develops a nice dry, stiff texture, and starts forming ribbon-like swirls. It should have a draw temperature (the temperature at which the partially frozen ice cream is removed from the machine) of between -9°C and -12°C (15.8°F and 10.4°F) with a lower draw temperature usually resulting in smaller ice crystals (Arbuckle, 1986).
Below are the residence times and draw temperatures for the domestic machines I've tried:
- [amazon text=Lello Musso Pola 5030 Dessert Maker&asin=B000FIWZLO&asin[ca]=B000FIWZLO&asin[uk]=B004S7BHE4&asin[de]=B004S7BHE4&asin[fr]=B004S7BHE4&asin[it]=B004S7BHE4]: 900 ml (0.95 quarts) mix – 13 minutes, -11°C (12.2°F).
- [amazon text=Lello 4080 Musso Lussino 1.5-Quart Ice Cream Maker&asin=B00004RDF0&asin[ca]=B00004RDF0&asin[uk]=B00004RDF0&asin[de]=B00004RDF0&asin[it]=B00004RDF0&asin[es]=B00004RDF0&asin[fr]=B00004RDF0]: 600 ml (0.63 quarts) - 16 minutes, -11°C (12.2°F).
- [amazon text=Cuisinart ICE-100 Ice Cream and Gelato Maker&asin=B006UKLUFS&asin[uk]=B00ARETWDK&asin[de]=B00ARETWDK&asin[fr]=B00EDOVBP2&asin[es]=B00EDOVBP2&asin[it]=B00ARETWDK&asin[ca]=B006UKLUFS]: 900 ml (0.95 quarts) mix – 35 minutes, -10°C (14°F).
- [amazon text=Breville BCI600XL Smart Scoop Ice Cream Maker&asin=B009OZ62IG&asin[ca]=B009OZ62IG&asin[uk]=B00CI32S0W&asin[de]=B00HFQDG5I&]: 700 ml (0.74 quarts) - 34 minutes, -9°C (15.8°F).
- [amazon text=Whynter ICM-200LS&asin=B00N63J432]: 900 ml (0.95 quarts) mix - 28 minutes, -10°C (14°F).
- [amazon text=Cuisinart ICE 30-BC&asin=B0006ONQOC&asin[uk]=B001D650FA&asin[de]=B002007HQI&asin[fr]=B002007HQI&asin[es]=B002007HQI&asin[it]=B002007HQI&asin[ca]=B0006ONQOC]: 900 ml (0.95 quarts) mix – 34 minutes, -11°C (12.2°F).
8. EXTRACTION TIME
The extraction time (the time it takes to get your partially frozen ice cream out of your machine and into the freezer) has a considerable effect on ice crystal size. This is because as you extract your ice cream from the bowl and into a plastic container, it spends time at room temperature. At this relatively warm room temperature, some of the ice melts from the large ice crystals and the crystals that were initially small melt completely. When you then get your ice cream into your freezer for the static freezing stage, the melted ice re-freezes onto the large ice crystals that survived. The result is that the total number of ice crystals is reduced and their size increases, resulting in coarse or grainy texture.
TIP#3 - QUICK EXTRACTIONJust holding ice cream at a relatively warm room temperature as you extract it from your machine results in an increase in mean ice crystal size and a decrease in the number of ice crystals present. It's therefore important that you extract the ice cream from the freezer bowl and get it into your freezer as quickly as possible.
9. THE STATIC FREEZING STAGE
At a draw temperature of between -9°C and -12°C (15.8°F and 10.4°F), your ice cream will have a consistency very similar to that of soft serve ice cream and will need to be placed in your freezer to harden. After about 4 hours, depending on your freezer, your ice cream will have a nice firm scoopable consistency, somewhere around -15°C (5°F), and be ready to serve.
10. SERVING YOUR ICE CREAM
Serve your ice cream at around -15°C (5°F). As the serving temperature is increased from -14.4 (6.1) to -7.8°C (18°F), flavour and sweetness become more pronounced.
If you do give the recipe a go, I'd love to hear your thoughts so please do get in touch. Please help other chefs by using the stars at the top of the page to rate the recipe and please spread the love on facebook with the buttons below. Ruben :)
SECTION 3: QUICK-READ RECIPE
- Fill a large bowl with some ice. Place some table salt and a zip-lock bag next to the bowl ready for later.
- Combine the sugar, skimmed milk powder, egg yolks, cream, and milk in a large pan. Heat over a medium heat until the temperature reaches 71°C (160°F), making sure you're constantly stirring.
- When the mix reaches 71°C (160°F), quickly turn the heat down to low and position your pan slightly off the heat. Continue heating and stirring until the temperature reaches 72°C (162°F).
- Once the mix reaches 72°C (162°F), continue heating for 25 minutes whilst constantly stirring.
- After 25 minutes of heating, carefully pour the mix into the zip lock bag. Place the bag in the large bowl and pour about a tablespoon of salt over the ice.
- Once the mix has cooled to below 5°C (41°F), place in the fridge to age overnight.
- The next day, place the crickets and brown sugar on a baking sheet, mix well, and grill on a medium heat for about 10 minutes until the crickets start to darken and crisp and some of the sugar has melted.
- Transfer the crickets and brown sugar mix to a pan and heat over a medium heat whilst constantly stirring. When you see the sugar start to smoke, quickly take the pan off the heat and add the caramelised crickets to a bowl. Allow the caramelised crickets to cool to room temperature and then place the bowl in the freezer for about 10 minutes to bring the temperature down to about 4°C (39°F).
- Pour the mix into your ice cream machine followed by the caramelised crickets and vanilla extract.
- After about 30 minutes of churning, depending on your machine, quickly empty the ice cream into a plastic container and place in the freezer for about 4 hours to harden.
- After about 4 hours, your ice cream will have a nice firm consistency and will be ready to serve.
References
Arbuckle, W.S., 1986. Ice Cream (4th ed). New York: Van Nostrand Reinhold.
Ben-Yoseph E., and Hartel, R. W., 1998. Computer simulation of ice recrystallization in ice cream during storage. Journal of Food Engineering 38(3):309–29.
Cook, K. L. K., & Hartel, R. W., 2010. Mechanisms of Ice Crystallisation in Ice Cream Production. Comprehensive Reviews in Food Science and Food Safety. 9 (2).
Damodaran, S., 1996. Functional properties. In: Nakai, S., Modler, H.W. (Eds.), Food Proteins – Properties and Characterization. VCH Publisher, New York, pp. 167–234.
Donhowe, D. P., Hartel R. W., and Bradley R.L., 1991. Determination of ice crystal size distributions in frozen desserts. Journal of Dairy Science. 74.
Donhowe, D. P., 1993. Ice Recrystallization in Ice Cream and Ice Milk. PhD thesis, University of Wisconsm-Madison.
Donhowe, D. P., and Hartel, R. W., 1996. Recrystallization of ice in ice cream during controlled accelerated storage. International Dairy Journal. 6.
Drewett, E. M. & Hartel, R. W., 2007. Ice Crystallization in a Scraped Surface Freezer. Journal of Food Engineering. 78(3). 1060-1066
Flores, A. A., & Goff, H. D., 1999. Ice Crystal Size distribution in Dynamically Frozen Model Solutions and Ice Cream as Affected by Stabilzers. Journal of Dairy Science. Volume 82. 7. 1399–1407
Goff, H. D., 2012. Finding Science in Ice Cream. Presentation - Royal Canadian Institute for the Advancement of Science.
Goff, H. D. and Hartel R. W., 2013. Ice Cream. Seventh Edition. New York Springer.
Monahan, F. J., McClements, D. J. & Kinsella, J. E., 1993. Polymerization of whey proteins in whey protein-stabilized emulsions. Journal of Agricultural and Food Chemistry. 41.1826–1829.
Phillips, L. G., Schulman, W. and Kinsella, J. E., 1990. pH and heat treatment effects on foaming of whey protein isolate. Journal of Food Science. 55:1116–1119.
Russell, A. B., Cheney, P. E., & Wantling, S. D., 1999. Influence of freezing conditions on ice crystallisation in ice cream. Journal of Food Engineering. 29.
Sava, N., Rotaru, G. & Hendrickx, M., 2005. Heat-induced changes in solubility and surface hydrophobicity of β-Lactoglobulin. Agroalimentary Processes and Technologies. Volume 11. 1. 41-48.